Tired of being tired?

Creating a Weather Station Terrarium

A weather station is a fun and exciting experiment for kids and it also teaches them how to care for a living thing as well.  It helps kids grasp the knowledge of what happens within a given day, anywhere, with weather and why it does what it does.

Jeff has been recording the weather in our own yard, for the NOAA out of Portland, for about 6 years now, so we are no stranger to weather stations. and Skylar loves any type of knowledge or education about weather.  Unfortunately, living here in Oregon we don't get a lot of fun weather activity like we did when we were in Arkansas, but it is still an exciting time when something does tend to happen. 

We recently took a trip to OMSI (Oregon Marine and Science Institute) here in Portland, Oregon.  We viewed how tornadoes were made by the weather, how rain is created inside a cloud, and also why hail is created by hot and cold fronts.  We also toured the USS Blueback while we were there too.

While learning about the weather and what can happen everyday, and how unpredictable it can be, we decided to purchase a weather station.  With the weather station on top of the bottle recording the weather, there is also a living plant inside the bottle depending on the moisture, oxygen, and nutrients inside the bottle to survive.   

The weather station we picked up at OMSI was the Green Science Weather Station.  It helps you observe and record the weather with a kit that has a wind vane, anemometer, a thermometer and rain gauge and the station is made to fit on top of a regular soda bottle or the like.  You can add water into the bottle at the bottom or even a small "terrarium-type" plant to add even more education.  We added a Star Plant because they work best (in my opinion) for a terrarium.  There are others you can use as well and Martha Stewart has several great videos to help you pick just the right one.  


Here are the steps we took in setting up our weather station terrarium:


For the bottle, you want to have one that has a normal-sized bottle top with treading.  Any soda bottle will work really, as long as it has the treading.  We first removed the label from our soda bottle and washed it out really well.  Then came the soil selection and pebble rocks.  In the images above we strained all the larger items from the soil before we added it to the bottle.

We added pebbles then the soil and then cut a small hole in the back of our bottle to add the star plant.  We wanted to the hole in the back of the bottle in case we ever had to get back inside and also to allow a little bit of oxygen to seep through to the plant.


Once everything was set up, we attached out weather station to the top and placed the bottle outside to collect the weather data we needed.  

Pinterest has some other great ideas for terrariums too.
Just know that succulents, cactus, and any other type of plant requiring little water will not do well in a terrarium.  

The Green Science Weather Station comes with a chart to help your child record the weather changes each day too.  Be sure and have them record the weather at the same time everyday to make sure their record is accurate.
  
We had a lot of fun with this weather station terrarium and I hope you do too!

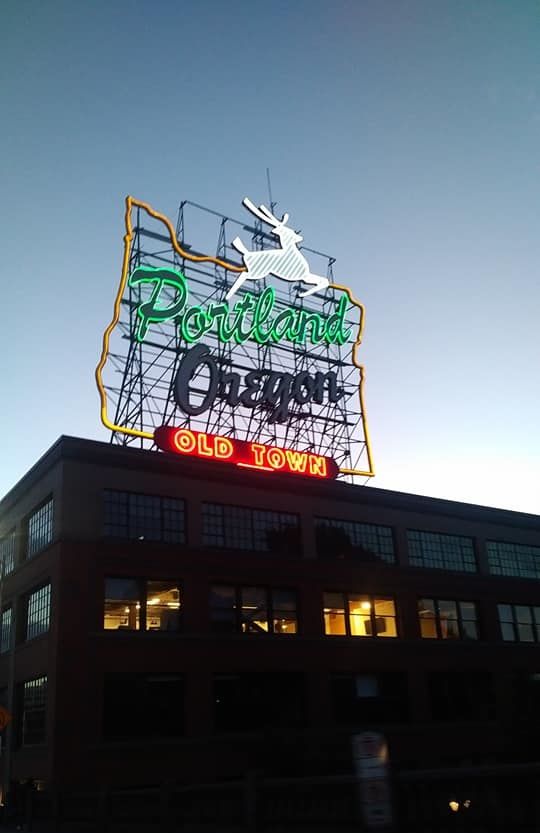
Here's a view from OMSI of downtown Portland, Oregon.  The night we went to OMSI the sky was clear and it was a great view of the city.


Eco-Tip:  While the summer months are here and giving off a great display of heat and sunshine, why not use that to your advantage when it comes to drying your clothes.  Using the clothes line during these season can save you about $10-$20 a month by using a clothesline.  For more tips visit, The Earth and Me Go Green.

Queso Dip and Veggie Wraps

I love white Queso dip!  There's this little restaurant in Sheridan, Arkansas called Cotija Mexican Restaurant and they have the best Queso dip in there.  It's almost comparable to Don Juan's Mexican Restaurant in Hot Springs, Arkansas, but I prefer Cotija's because I get to go there with John when I am back in Arkansas.  We have this little back bench we sit at and it's very cozy.  Although, it is near the kitchen door where they cook and prepare everything, and I am always prone to look in there just to be nosy.  But it does have it's benefits, I always know when our order is coming out.  Ha!

The Queso dip they serve at both of these Mexican restaurants is almost impossible to duplicate and I have been on a hunt to find something similar for the longest time now.  I have experimented with different cheeses and different seasonings just to find that one-of-a-kind taste, only to come up short handed once again.  But I have found a nice, "tide me over" alternative to their delicious dip.


What's you'll need:

(This recipe was created when I was vegan for 6 years prior to dipping SLOWLY back into eating meats once again)

Make sure the cheese you pick is definitely Mozzarella cheese though, or it won't melt right and it will be a sticky mess later.  

Pair this dip with your favorite chips, or make your own!

You can pair this Queso dip with chips, bread, or even a veggie wrap.


All you need is, a flour or wheat tortilla, cream cheese, herbs and garlic goat cheese (you can get all of these ingredients organic too by the way), black olives, pickles, shredded cheese, and uncured ham.

Start by coating the tortilla with a generous amount of goat cheese and cream cheese. 


Add the black olives, shredded cheese, ham slices and pickles.


Roll up burrito style and tuck one end under to create a pocket to contain all of your goods.


There it is!

Veggie wrap!  You can dip this in the Queso or just eat it along side the Queso by itself.

Look how wonderful these cherry tomatoes look too!


Enjoy!
  

Eco-Tip:  Having beehives is a great way to live off your own land.  Consider keeping one hive before winter hits and see how well you do, then venture out to get more.  For tips on getting starting in the beekeeper business visit the National Honey Board website.  For more tips on living better and homesteading visit, The Earth and Me Go Green.


Tin Can Speakers

Have you ever wished you had a set of speakers that were a bit louder than what you're used to, but also cool and handmade?  Well, tin can speakers are amazing and they are so easy to make too.  Here's how it's done:


Starting with two similar tins of the same style and size, you want to cut a small hole in the back of the tin.  A hole small enough to be covered later, but large enough to fit a wire through it.  I used a hammer and a nail and beat the nail through the metal from the inside out.


Take apart headphones (make sure they aren't ear buds).  I went to local shops and yard sales till I found the right ones.  You then want to dismantle them completely and set the pieces aside.  Be sure and save the foam padding too.

Line up your speakers on the back of two playing cards.  Trace the outline of the speaker with a pencil or marker and poke a few holes into the playing card where the speaker will be laying against the back of the card.

Glue the speakers to the back of the playing card where the holes match the sound output on the speakers, similar to the image above.  I used super glue just around the very edge of the speakers and allowed it to dry completely.

Once you glue is dry, thread the wire through the back of the tin where you made the hole.  If you have to you can make the hole a bit bigger to fit the equipment through completely then cover with electrical tape once everything is put back together.  


Place the foam padding into the tin first then follow with your speaker cards.  You may have to cut the card a bit on the edges to fit into the tin properly without looking too messy.  You may also need to add a bit of electrical tape around the hole of the tin in the back so it won't damage the cord as you use it.  

Once you tin speakers are all put together, you can plug them into your iPod, phone, or even your radio at home.  We like to take our camping with us and allow everyone around the hear the groovy tunes it lets out. Remember, you can use just about any tin you want from an Altoids container to a cookie tin too!


Eco-Tip:  Repurposing a candy tin into speakers is a great way to keep waste out of landfills, but you can also repurpose them into other things like, a sewing kit, tackle box, a little tin wallet, or even a first aid kit.  The possibilities are really endless with these little tins.  For more tips visit, The Earth and Me Go Green.


Sassy Water with Mango

There's a lot of blog posts out there right now of every one's version of Sassy Water, so I thought I would bring my own version to the table and add it to the many others being posted.  What you'll need is, coconut water, all natural lemonade, ginger tea, fresh lemons, and fresh mango.


Start with all natural lemonade.  I like to use Newman's Own because of the quality taste.  You want a ratio of equal parts coconut water to equal parts lemonade.

Add slices of real lemon.

Next add chunks of whole mango straight from the fruit.  You could used canned or frozen mango, but fresh is always best.  Follow that with a tea bag of REAL ginger tea.  You can just place the tea bag straight in the lemonade before adding it to your refrigerator.

Place in the refrigerator overnight and enjoy all day the following day.  Ginger is a nice addition because it helps remove toxins.  Mango and lemon add a bit more flavor to the water combination and coconut water will help keep you hydrated all day.


You can also try this sassy water with a sprig of mint, lavender, or even cucumbers added.

ENJOY!


Eco-Tip:  Harvesting your own rain water is such a great way to conserve water and cut down on your energy use from outside sources.  To learn how to harvest your own rain water visit, The Earth and Me Go Green.